A biochar pit is a way to turn waste wood into useful soil conditioner.
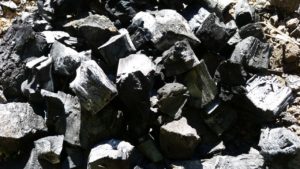
This Winter with the return to burning season I have been making some more biochar, this time burning the wood in pits. The aim is to make optimal use of our waste timber, from camphor laurel we have cut to clean up the block. Biochar is said to be a soil conditioner that lasts for centuries, better than just burning wood to ash or leaving it to rot.
I made two biochar pit fires and have been very happy with the yield of char. Through trial and error I am developing a system for biochar production that suits our needs and situation. Next step will be to mix the char back into beds and see how the soil performs.
About biochar
Biochar is just organic material (wood in our case) that has been roasted to charcoal. While burning, wood actually goes through a couple of stages; first, as it heats up, some of the components vaporise to become flammable gases which drive the burn, leaving a charcoal (carbon) skeleton of the wood. If there’s plenty of oxygen from an air flow the charcoal burns at a higher heat to leave just ash. The trick with biochar is to limit the oxygen supply so that the fire only burns the volatiles and stops before the charcoal is lost.
The stability of biochar in the soil makes it a good way to sequester carbon. Our source material is felled camphor laurel, which is a weedy tree that colonises the forest edges. It is abundant and competes not only with the native trees but also with pasture or vegetable beds through its extensive surface root system. The felled wood can be left to rot or burnt to ash in open fires, and in both cases the carbon returns to the atmosphere as CO2, but with biochar the carbon becomes effectively a soil mineral.
Terra preta and soil conditioning
Biochar became of interest in horticulture and agriculture when it was noted that in some areas of South America there are patches of rich black ‘terra preta‘ soil among the leached tropical ‘natural’ soils. The terra preta soils have high productivity and appear to be self-sustaining, in contrast with the poor fertility of the un-modified surrounding soil. The difference is the presence of charcoal particles in the soil, which seem to have multiple beneficial effects such as water and nutrient retention and providing a substrate for beneficial organisms such as fungi.
A problem that our soils here have in common with tropical South American soils is that their high water permeability combined with high rainfall means that some nutrients can easily leach away and the soils become acidic. My aim is to test whether adding biochar to our soils can make them more stable and productive in the long term.
Making the pits
Last year we did our first biochar burn. It was an on-ground fire, which gave good yield, but then I saw that Jim at Texas Eco Farms was making biochar in a pit, so I decided to give that a try. While Jim dug a conical pit in their sandy soil, it seemed more sensible to dig rectangular prism (grave shaped) pits in our loamy soil.
Why pits? Our on-ground fire was easy to stack but hard to cover with soil, which led to a fast and hot burn. We got a good char yield but I felt it could have been better with more insulation. With pits the earth sides are perfect for excluding air from the burn, and you can make the top of the wood pile flat, and so much easier to cover with soil.
Biochar pit 1
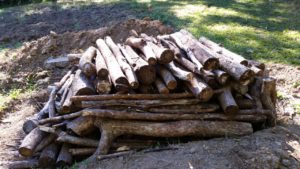
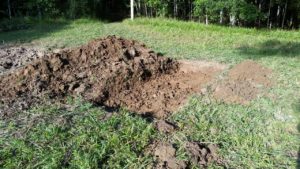
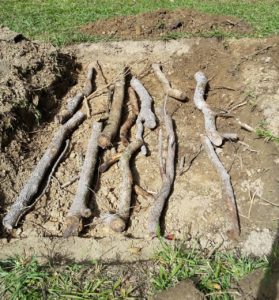
The first biochar pit accommodated a pile of cut camphor that had been sitting since last September when the fire ban season was declared early. It had survived our wet Summer OK, but I was keen to get it burned. I dug a roughly 2.5 x 2.5 metre pit to spade depth, putting the spoil to one side, then cleaned out the base to roughly another half spade depth. As the pit was dug in a gentle slope there was a top and bottom end.
I stacked the base first with long straight poles, running up the hill. These are meant to function as ventilation allowing the fire to spread up and through the pile. Then I packed fairly tightly with cross pieces, then back to ‘up hill’ and so on. The finished pile reached a way above ground level.
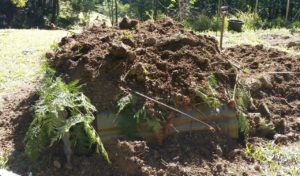
For covering the pile, bracken is good to use as a blanket that stops the soil from falling in as you shovel it on. We have plenty on the property, and it’s fairly quick and easy to pull a good quantity of fronds. Even with a covering of bracken the sides of the pile were going to be hard to cover with soil, so I used some scrap roofing iron to wall in the sides, then piled the bracken on and finally shovelled soil over to make a complete cover.
The finished pile lit easily from a hole I left on the downhill side, and rapidly became a hot fire. As the wood burns the soil layer tends to fall in and lose its blanket cover, allowing the fire to burn hotter. Just like with last year’s above ground fire I was worried that it was too hot and open and would burn to ash, but there’s nothing much you can do once it’s a good burn.
Yield
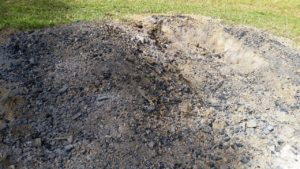
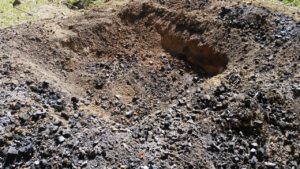
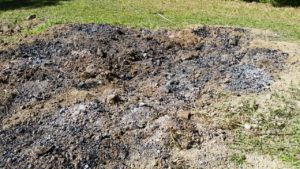
The fire had burnt down by the next morning, so I dug it out to expose the last pockets of embers. This is an important step as they can continue to burn away to ash. Quenching with water or mixing with cool earth both work to extinguish the coals.
I was pleasantly surprised with the yield of char from this burn, and it spurred me on to make another fire to clean up the remainder of camphor waste lying around.
Biochar pit 2
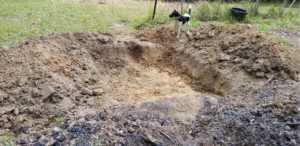
From the results of the first biochar pit I decided to dig the second one deeper and with more vertical sides to maximise the soil insulation. With the whole pile ‘underground’ it would also be easier to cover it effectively with soil.
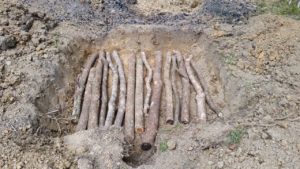
The wood pile was similar, although the pieces this time were mainly large diameter, up to around 30 cm, so substantial logs. I tried to stack them more tightly too, as it seems that as long as you put in bottom ventilation the fire will burn well.
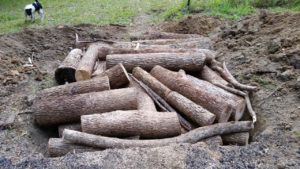
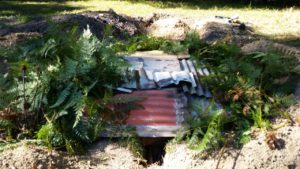
The cover this time was all roofing iron, then a layer of soil. I used bracken around the edges to bridge the gap between tin and soil.
I also tweaked the ventilation by digging a slot at the base of the slope for lighting the fire, which makes it easy to choke later. I also put a small flue at the top of the slope with the aim of getting a clear through-draft. The flue was just a scrap piece of guttering elbow and it allowed me to keep a neat hole in the earth cover. The title photo shows this biochar pit burning, with the flue just visible on the right hand side as a plume of smoke.
Yield
This pit burned quite slowly at first, but by morning the iron cover had collapsed and it had fallen in on itself and opened up. The edges were still burning, so I quenched it with plenty of water. There was however plenty of charcoal in this one, probably the best yield of the three fires. The pieces of char tended to be larger. There was also no un-burnt wood, where there have been a small number of ends in the other fires.
A final difference with this pit was the large amount of sooty soil. These were clods that had become blackened throughout. It seemed that the cover soil that sat over vents in the roofing became charged with soot being carried by the smoke. I figure this is a good thing as it’s still carbon captured, just in microscopic particles.
Conclusions
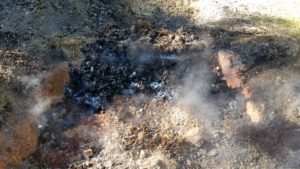
These biochar pit methods are I think very good for making biochar for soil remediation.
As the soil falls in on the char fire, and is mixed in with the quenching, it becomes difficult to gauge just how much char is generated, but there certainly is plenty. The cover of soil is roasted, which has a bonus of eliminating weed seeds. Also, with the second pit much of the soil became blackened with soot.
It seems that the way the soil falls in to the fire as it burns is good for quenching the coals, possibly as it gives a tighter air-excluding cover. I think the thicker the soil cover the better, although there is a trade off with shovelling effort.
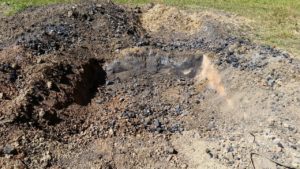
The tin roof gave the most satisfactory result, and next time I will put in the extra effort of adding more soil cover. A good design would also be to make the tin fit snugly inside the biochar pit so that it falls as the wood burns down, rather than getting stranded on the pit edges.
The biochar pit sides seemed to have the best char, so to maximise edges the next pit I try will be long and narrow, maybe 1200 x 3000 x 500 mm.
It is a lot of heavy work, starting with felling and cutting the trees, moving the timber, and digging and making the pits, but I think the reward is worthwhile.
Next
Now I need to turn the products into productive soil. At the moment the ground is pretty sterile, so first step after digging the plots back level will be to sow some cover crops. With the warm season coming on, things like millet, mung or soy beans, sunflowers, and chia, are all good performers here. The aim is to get the soil re-colonised by worms and microflora, which will begin the process of establishing a biochar-linked ecosystem which will hold moisture and nutrients. It will be interesting to see how it develops.

