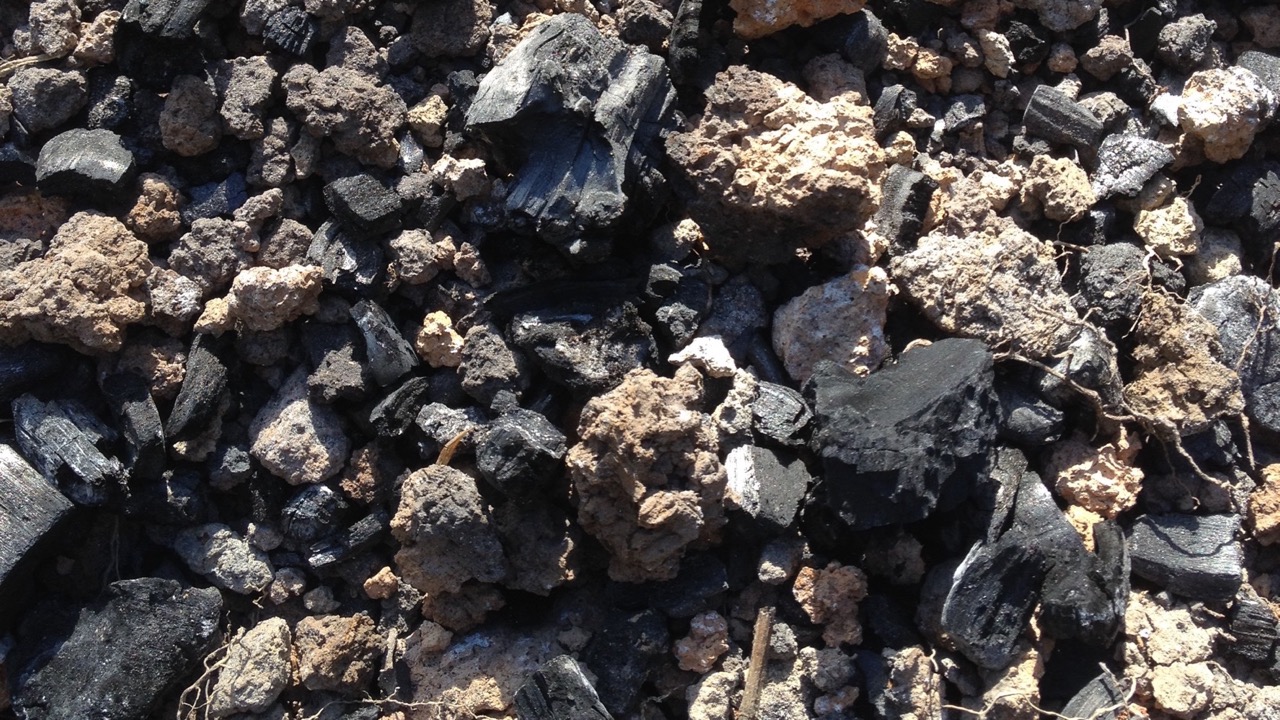
Biochar seems to be something worth trying here, and that involves either making a biochar kiln or building a biochar fire in the field. There are several aspects that make it seem an ideal soil conditioning process, from availability of raw material to the need to bolster our soils. It has taken a while to cut the wood, season it, and finally have good weather for burning, but we have at last made our first biochar fire, with good results.
Why try biochar?
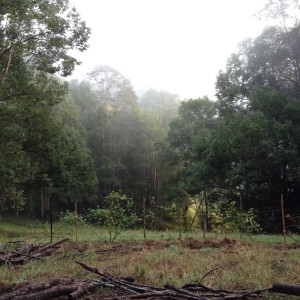
The prime stimulus for trying biochar here is that we have a lot of cut timber from camphor laurel (Cinnamomum camphora) trees that we fell. Camphor is a declared weed, introduced from SE Asia, which colonises the edges of forest in thick stands. Consequently we are able to cut it without permission, and clearing it improves the quality of both the forest behind it and the pasture in front. Fortunately it looks like it is useful in several ways.
The most well-known use is for its beautiful honey coloured camphor wood, which is famous as a cabinet timber, and here is used a lot for chopping boards. That heart wood comes from the large trees though, and we are cutting smaller ones without good colour.
Our first use for the camphor is to chip it and use it as mulch. This is an immediate use for the stems less than 10 cm diameter, and we hire a chipper the day after we do a round of felling to clear up all the branches. This leaves a lot of wood, and that is where the biochar comes in.
What is biochar?
There are a lot of articles available online that discuss the benefits of charcoal in the soil. One line of research comes from the observation of ‘terra preta’ soils in the amazon, which were a way that the indigenous people stabilised their soils for agriculture. The amazon soils have similar challenges to ours for agriculture; high rainfall and temperatures have led to mineral leaching and acid soils which are at risk of losing nutrients when the forest is cleared. The black terra preta soils appear to have been created by generation of biochar, which is organic material burnt to charcoal rather than ash. The charcoal is long-lived in the soil and serves to hold both minerals and moisture in place for use by crop plants.
Biochar has a further benefit of sequestering carbon in the soil. Our camphor logs will rot if we leave them, and provide a nutrient cycle of through decomposing fungi and the life they support, but ultimately the carbon is returned to the atmosphere. Similarly, burning the wood in an open fire generates ash which is a good alkaline fertiliser, but the carbon is also returned to the air. When the carbon is turned to charcoal it resists breakdown and also conditions the soil permanently, a win-win.
The fundamental principle of making charcoal (and making a biochar fire) is that the wood has to burn at relatively low temperature and with limited oxygen. In these conditions only the volatile components of the wood (which turn to gas at moderate heat) burn, leaving the carbon matrix. A hot, oxygenated fire goes on to burn the char as well, leaving just ash.
Making a biochar fire
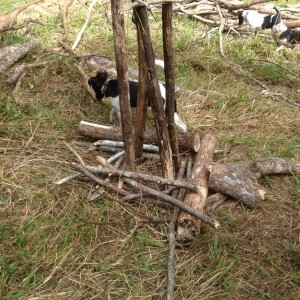
The wood had sat for nine months since we cut it, so was seasoned for burning. Our fire (permission) season begins in late Autumn, so that also dictates when we can burn. The site was ideal, as we have a level area that I would like to cultivate (the Mid Levels), and building the fire on the future garden site has the added advantage of killing at least some of the heavy burden of weed seeds that are present.
There are some good online descriptions of how to make a traditional charcoal ‘clamp’ and some videos too, which we based our method on.
The preparation began with construction of a chimney, which is the central point where the fire is introduced, as well as the focus for the initial hot blaze. We made ours simply from four relatively straight sticks about 1.75 m high, braced into a square cross section with sticks lashed at the top.
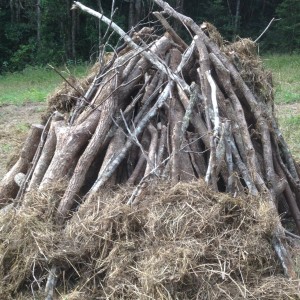
The next stage was to stack small wood (this will be the start of the fire) around the chimney base, and begin to lay logs against this in a radial pattern. We were cutting the timber to approximate size as we went.
The final stack was steeper than I had envisioned, but as it was the first go and we didn’t know how it would go, we stopped when we had used the stockpiled wood.
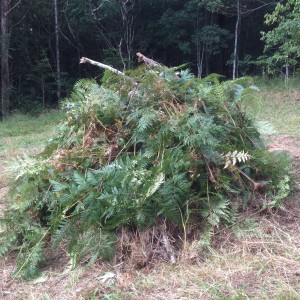
Next step was to cover the wood with a layer of grass and bracken, which holds the soil cover in place over the wood. This was quick and easy, but next time I would spend more time laying the bracken fronds out in an even layer.
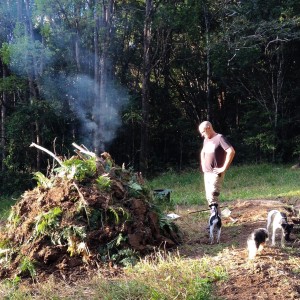
The final stage of construction was to cover the pile in a layer of soil. The soil there has a high clay content, so it is fairly easy to cut tiles of soil and lay them like shingles. The role of the soil layer is to restrict air getting into the fire, and to hold the heat in.
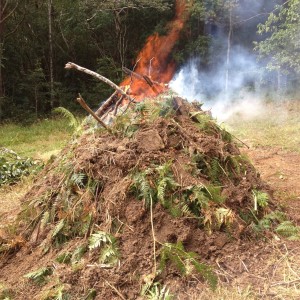
When it’s all built, it’s time to light the fire. We tried a few methods, but the best was (of course) as described in the online articles. We tried dropping lit firelighters and brands down the chimney, but although these smouldered for a while, they ultimately went out. We came back the next day in light rain, built a proper side fire out of charcoal and sticks, and when the coals were well alight, scooped them up with a shovel and dropped them down the chimney. This time it lit straight away.
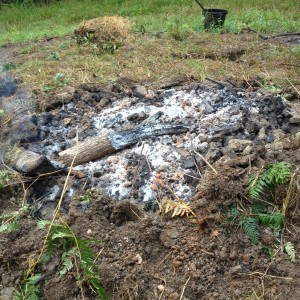
I was surprised how well the biochar fire burnt, and the lesson was that the soil layer can really be thick and even. The advantage of the design is that the fire tends to fall in on itself, and can be moderated by throwing soil into the top. Once well alight, it needs to smoulder for a few days, depending on the mass of wood, and it burns on underneath the soil cover.
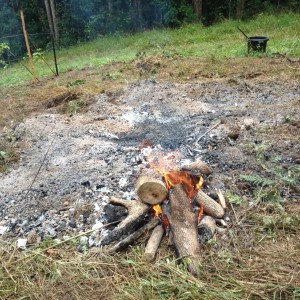
We finally opened the biochar fire after two days, when the centre was well burnt, and the outside seemed to have mostly burnt away. Raking out the coals extinguishes them by sudden cooling (this is really a Winter activity), and allows you to collect the buried timber ends that haven’t burnt. It was easy to stack the unburnt ends, add a little grass, and burn them away in a little side fire.
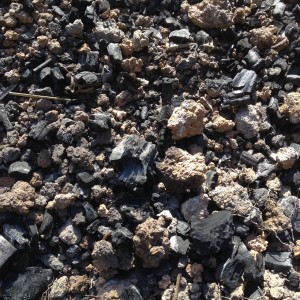
I was impressed with the yield of char. There was a good mix of charcoal and burnt earth, which looks like it will mix with a large area of garden. I’m waiting for some rain forecast this weekend to wash the ash in, then will dig the area over to incorporate the char, then broadcast some buckwheat as a quick test crop.
Overall I’m impressed with the biochar fire as a useful way to dispose of waste timber. We will see how the bed grows crops, and ultimately vegetables. It’s a lot of work hauling the wood, stacking, and covering with soil, but the yield of biochar will make it worthwhile if the final soil improvement is as good as promised.

