This really works! As a kid we went to strawberry farms which had huge rows of black plastic with strawberries planted along them, and it always seemed a bit mean to the plants to have them almost smothered, but it really works for growing strawberries in the home garden too.
Growing strawberries
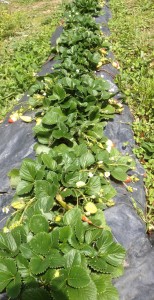
As strawberry plants grow close to the ground they can be particularly prone to being overgrown by weeds, and the fruit are right where a passing slug or other opportunist might have a quick feed. This is where the plastic comes in handy; it completely shades the ground, preventing weed seeds from germinating and growing, and it also makes a clean platform for the ripening strawberries to sit on, helping to prevent rot and pest damage.
I tried growing strawberries over a black plastic mulch in a reaction against the disaster of my new strawberry patch which was in a fertile but relatively inaccessible part of the garden. While my attention was turned elsewhere the weeds would endlessly germinate and grow higher than the strawberry plants, and then it was a chore to carefully pull them out while standing in a tight space. So in Autumn this year, as I had decided to make new beds in my ‘Midlevels’ garden, I decided to try the black plastic technique for growing strawberries in a new crop. Autumn here is the time to collect runners off the old plants and start them in fresh beds.
Experts advise that you grow each bed for three years, so if you have the space, you could have three beds on the go – one and two year old, and the third year which you keep for the Summer then replace (elsewhere) with a new bed.
Practicalities

The process is straightforward. I dug a long bed, mounding the edges in to the centre to raise it, then limed and manured the soil and gave it a good watering. Strawberries prefer a slightly acidic soil (pH 6 – 6.5) but my soil is way more acidic than that, so test yours and lime it only if the pH is lower than 6. Next I laid black plastic (which was hanging around from a previous use) over, and cut it with generous overlap at the sides. I then anchored the edges in the trenches each side with a layer of dirt. From there it is easy to cut small ‘x’ holes every 30 cm or so down the middle of the mound, and insert a strawberry runner in each.
At planting the runners don’t have roots, but they establish readily in a few weeks, and will self-prune by losing leaves if the initial water stress is too high. They then grow through Winter, and now at the start of Spring they are beginning to bear a heap of fruit. In cold climates you would set out the runners in Spring to grow through summer.
If you have runners sitting around before your bed is ready, you can give them a head start by planting them thickly in pots while they grow roots, then pulling apart the new plants to plant once established.
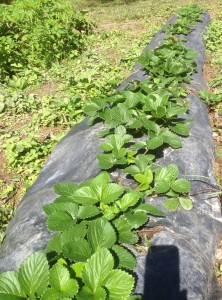
As for watering, drip irrigation is a good idea if you get prolonged dry weather, but so far mine have not needed extra watering, and it is easy to put a sprinkler over them in the drier weather. The black plastic actually keeps the soil quite moist, maybe allowing wicking from the edges where the rain sheds.
Fresh strawberries!

At the moment we are picking a handful each day, but it looks like the crop will increase steadily for the next while.
If you grow strawberries yourself you will always be able to use whatever fruit you get, whether you preserve them by freezing or making jam, eat them fresh, or give them away.

